How to back up your iPhone to iCloud

How to Back Up Your iPhone to iCloud – Step-by-Step Guide (2025)

Backing up your iPhone is crucial to keeping your data safe. Whether you’re upgrading to a new device, troubleshooting issues, or just protecting your photos and messages, iCloud backup ensures your iPhone data is securely stored online.

In this guide, we’ll walk you through how to back up your iPhone to iCloud in just a few simple steps—no cables, no computers needed.

Why You Should Back Up Your iPhone to iCloud

Before we dive into the how-to, here are a few reasons why you should back up your iPhone:

  • Protect your data from loss or damage
  • Restore content on a new or reset device
  • Automatically save photos, contacts, messages, app data, and more
  • Peace of mind your memories and files are safe in the cloud

Step-by-Step: How to Back Up iPhone to iCloud

Step 1: Connect to a Wi-Fi Network

To perform an iCloud backup, your iPhone must be connected to Wi-Fi. Cellular networks typically do not support full backups due to size limitations.

  1. Open Settings
  2. Tap Wi-Fi
  3. Select a network and enter the password if needed

Step 2: Turn On iCloud Backup

  1. Open the Settings app
  2. Tap your Apple ID name at the top of the screen
  3. Go to iCloud
  4. Tap iCloud Backup
  5. Toggle iCloud Backup ON

Once turned on, your iPhone will automatically back up daily when:

  • It’s connected to Wi-Fi
  • Plugged into power
  • The screen is locked

Step 3: Manually Back Up Your iPhone Now

Want to back up immediately? Here’s how:

  1. Go to Settings > [your name] > iCloud > iCloud Backup
  2. Tap Back Up Now

Depending on the size of your data and internet speed, the backup may take a few minutes to complete.

Step 4: Check Your Backup Status

After the backup finishes:

  1. Return to Settings > iCloud > iCloud Backup
  2. Under Last Successful Backup, you’ll see the time and date of your last backup

What Gets Backed Up to iCloud?

iCloud backs up:

  • Photos & videos (if iCloud Photos is off)
  • App data and settings
  • iMessages, SMS, and MMS
  • Device settings (Wi-Fi, wallpapers, Home screen layout)
  • Visual Voicemail password (if supported)
  • Health and Activity data (requires encrypted backup)
  • Purchase history from App Store, Music, TV, and Books

Tips for Managing iCloud Storage

Apple offers 5GB of free iCloud storage, but this fills up quickly. Here’s how to manage or upgrade:

  • Go to Settings > [your name] > iCloud > Manage Account Storage
  • Tap Change Storage Plan to upgrade (e.g., 50GB, 200GB, or 2TB)
  • Delete old backups or unused app data to free space

Bonus: How to Restore from iCloud Backup

If you get a new iPhone or reset your current one:

  1. Turn on the device and follow the setup steps
  2. On the Apps & Data screen, tap Restore from iCloud Backup
  3. Sign in with your Apple ID
  4. Choose the most recent backup to restore from

Backing up your iPhone to iCloud is one of the easiest and most effective ways to protect your data. With just a few taps, you can ensure your photos, contacts, and app settings are safe—no matter what happens.

Make it a habit to check your iCloud backups regularly or enable auto-backup so you never lose important data again.

How to take a Hearing Test and turn on the Hearing Aid feature

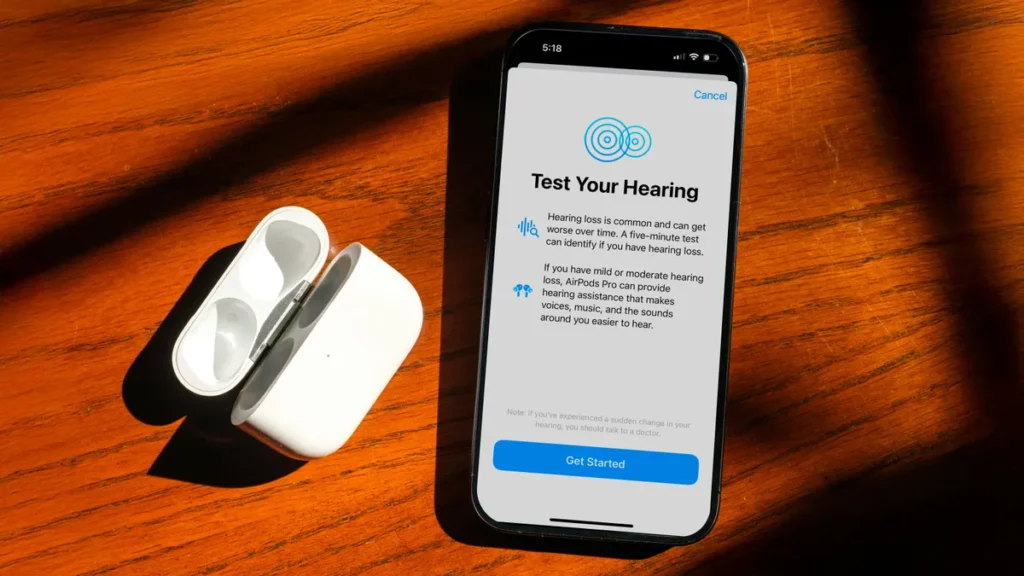
If you’re having trouble hearing clearly or want to personalize your AirPods or headphones to your unique hearing needs, your iPhone has built-in tools that can help. In this guide, we’ll show you how to take a hearing test and activate the Hearing Aid feature on your iPhone, step by step. Whether you’re using AirPods, Beats, or other supported headphones, this is an easy and powerful way to boost your audio experience.

What Is the iPhone Hearing Aid Feature?

Apple offers a feature called Headphone Accommodations, designed to enhance soft sounds and adjust certain audio frequencies for your hearing. This is especially useful for people with mild to moderate hearing difficulties.

You can even take a hearing test and use those results to create a personalized audio profile for your device.

Step-by-Step: How to Take a Hearing Test on iPhone

Option 1: Use the Built-In Audiogram (From Apple Health)

  1. Open the Health app on your iPhone.
  2. Tap Browse → Search for Hearing.
  3. Tap Audiogram → Import an existing hearing test if you’ve done one with a health provider.
  4. Once added, your iPhone can use this audiogram to optimize sound output.

Option 2: Use the Mimi Hearing Test App

If you don’t have an audiogram:

  1. Download the Mimi Hearing Test app from the App Store.
  2. Follow the on-screen instructions to complete the test (takes about 5–10 minutes).
  3. Once finished, tap “Save to Health” to export the audiogram to your Apple Health data.

How to Turn On the Hearing Aid Feature (Headphone Accommodations)

Once your audiogram is in the Health app, follow these steps:

  1. Open Settings on your iPhone.
  2. Tap Accessibility → then Audio/Visual.
  3. Tap Headphone Accommodations.
  4. Toggle the switch to ON.
  5. Tap Custom Audio Setup.
  6. Choose Use Audiogram or manually adjust the settings for voice, music, or phone calls.

Apple will now optimize the audio output across supported devices (like AirPods Pro, AirPods Max, or Beats) based on your hearing profile.

Bonus Tip: Live Listen – Turn Your iPhone into a Microphone

Another amazing accessibility feature is Live Listen, which turns your iPhone into a remote mic and sends sound directly to your AirPods or Beats.

Here’s how to enable it:

  1. Go to SettingsControl Center.
  2. Tap the + next to Hearing.
  3. Open Control Center and tap the Ear icon.
  4. Tap Live Listen to turn it on — now your iPhone will capture nearby sounds and send them to your headphones.

Why Use Hearing Features on iPhone?

  • Enhanced clarity for calls and media
  • Personalized audio tuning
  • Early detection of hearing loss
  • Improved quality of life and communication

Apple’s hearing tools are powerful and user-friendly. Whether you’re just curious about your hearing health or need help understanding speech more clearly, the iPhone can act like a basic hearing aid when combined with AirPods and accessibility settings.

If you want better sound clarity without the cost of traditional hearing aids, this is one of the best solutions available today.

How to remove and replace the ear tips on your AirPods Pro

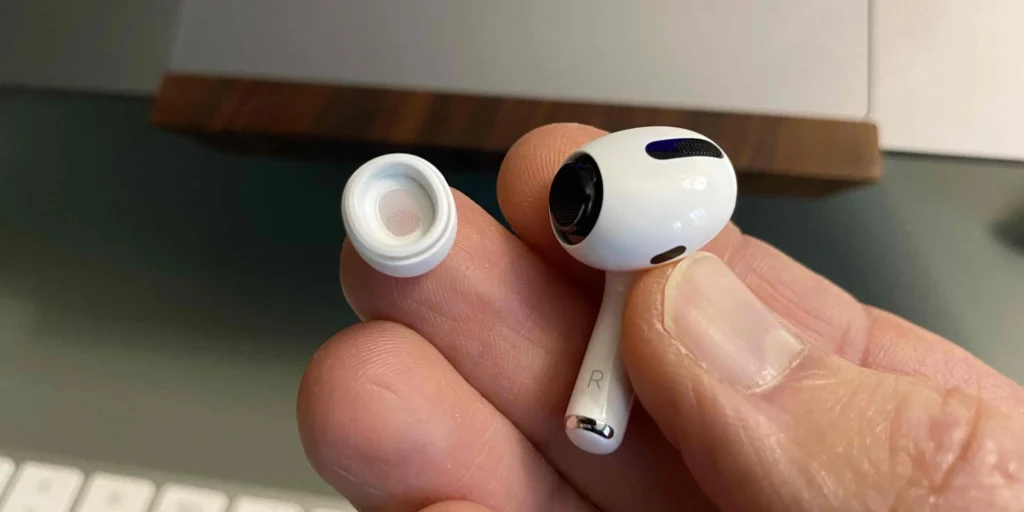
Removing the Ear Tips

  1. Grip the silicone tip firmly. Use your fingertips (not the stem of the AirPod) to hold the rubber base of the tip.
  2. Pull gently but steadily. Grip and tug directly outward until the tip snaps off. It should detach with a noticeable click.

Attaching a New or Different-Sized Tip

  1. Select the desired replacement tip. AirPods Pro come with small, medium, and large tips.
  2. Align the oval opening. Match the ear tip’s oval connector with the AirPod’s jet nozzle.
  3. Push until it clicks. Apply gentle pressure until the tip firmly snaps into place—move it slightly to ensure it’s seated.

Checking for a Good Fit

  • Ear Tip Fit Test (iOS):
    1. Connect your AirPods Pro to your iPhone.
    2. Go to Settings → Bluetooth, tap the next to your AirPods.
    3. Tap Ear Tip Fit Test, then Continue and press Play. The test confirms if you have a proper seal.
  • Manual check: If sound seems muffled or you experience inconsistent bass, try a different-sized tip for a better seal.

Tips & Care

  • Clean when switching: Gently wipe off any earwax or debris using a soft, dry, lint-free cloth.
  • Replace every few months if tips start stretching or lose their sticky fit—Apple suggests regular replacement for hygiene and sound quality.
  • Keep your set: Always store the removed tips (if clean) in a small case to avoid losing them.

Quick Recap

StepAction
1Pull ear tip straight off
2Match and push new tip on until it clicks
3Test fit using iOS or by feel

Switching ear tips is a simple process that can significantly improve comfort and sound isolation. Need help choosing the right size or troubleshooting fit issues? Just let me know!

How to use Safety Check on your iPhone

How to Use Safety Check on Your iPhone: A Step-by-Step Guide

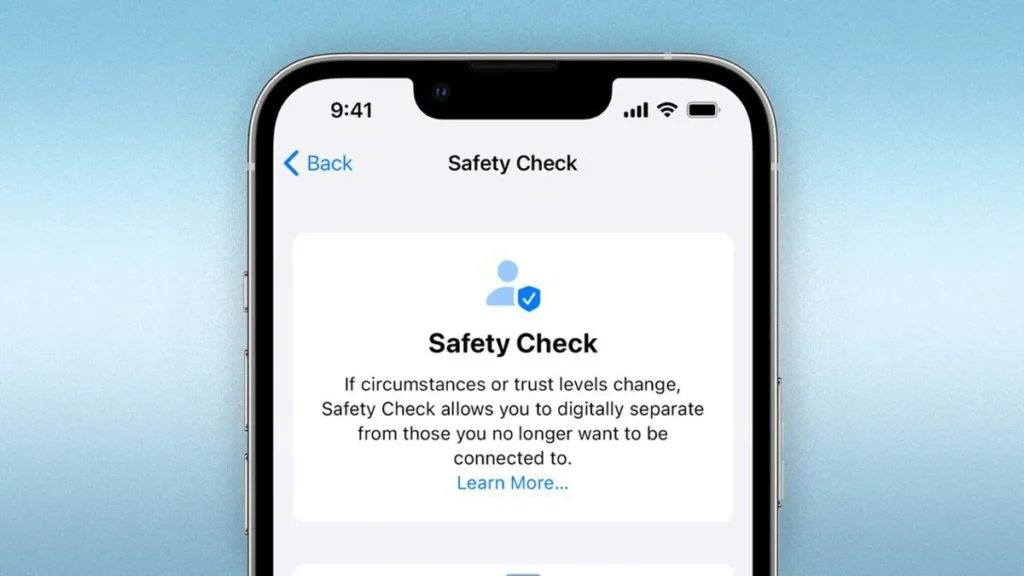
Apple’s Safety Check feature is designed to help you review and manage the people and apps that have access to your information and devices. Here’s a step-by-step guide on how to use Safety Check on your iPhone:

What is Safety Check?
Safety Check is a feature introduced in iOS 15 that allows you to quickly review and manage the people and apps that have access to your information and devices. It’s an essential tool for maintaining your digital safety and security.

Step 1: Access Safety Check

  1. Go to Settings: Open the Settings app on your iPhone.
  2. Tap on Your Name: Tap on your name at the top of the screen.
  3. Select Emergency SOS: Tap on “Emergency SOS” and then select “Safety Check.”

Step 2: Review and Manage Sharing

  1. People: Review the people who have access to your location, photos, and other information.
  2. Apps: Review the apps that have access to your information and devices.
  3. Manage Sharing: Manage sharing settings for each person or app.

Step 3: Emergency Reset

  1. Emergency Reset: If you’re in a situation where you need to quickly cut off access to your information and devices, use the Emergency Reset feature.
  2. Confirm: Confirm that you want to reset your sharing settings and cut off access.

Step 4: Review and Update Settings

  1. Review Settings: Regularly review your Safety Check settings to ensure you’re sharing information with the right people and apps.
  2. Update Settings: Update your settings as needed to maintain your digital safety and security.

Tips and Best Practices

  • Regularly Review Settings: Regularly review your Safety Check settings to ensure you’re sharing information with the right people and apps.
  • Use Strong Passwords: Use strong passwords and two-factor authentication to protect your Apple ID and devices.
  • Be Cautious with Sharing: Be cautious when sharing information with others, and only share what’s necessary.

By following these steps and tips, you can use Safety Check to maintain your digital safety and security on your iPhone. Stay safe and secure!

How to use Find My on iPhone and iPad

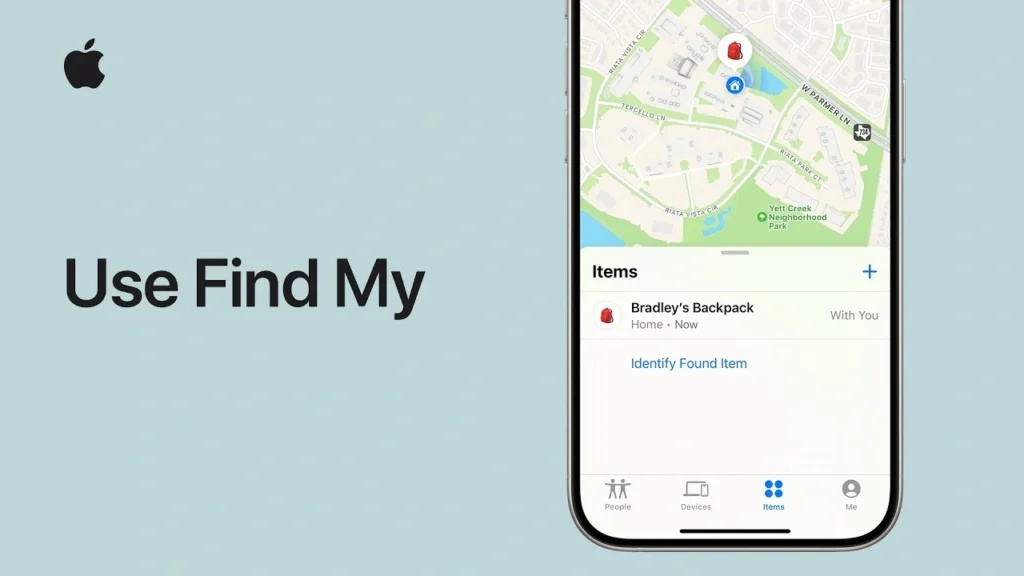
Losing your iPhone or iPad can be a stressful experience, but with Apple’s Find My feature, you can locate and recover your device. Here’s a step-by-step guide on how to use Find My on iPhone and iPad:

Step 1: Enable Find My on Your Device

  1. Go to Settings: Open the Settings app on your iPhone or iPad.
  2. Tap on Your Name: Tap on your name at the top of the screen.
  3. Select Find My: Tap on “Find My” and toggle on “Find My iPhone” or “Find My iPad.”
  4. Enable Location Services: Make sure Location Services are enabled on your device.

Step 2: Locate Your Device on a Map

  1. Open Find My App: Open the Find My app on another Apple device or visit (link unavailable) on a web browser.
  2. Sign in with Apple ID: Sign in with your Apple ID and password.
  3. Select Your Device: Select the device you want to locate from the list of devices.
  4. View on Map: Your device’s location will be displayed on a map.

Step 3: Use Find My Features

  1. Play a Sound: If your device is nearby, you can play a sound to help you locate it.
  2. Lost Mode: If your device is lost or stolen, you can put it in Lost Mode to lock it and display a custom message.
  3. Erase Device: If you’re unable to recover your device, you can erase it remotely to protect your data.

Step 4: Recover Your Device

  1. Use Find My to Locate: Use the Find My app or (link unavailable) to locate your device on a map.
  2. Contact Authorities: If your device is stolen, contact local authorities and provide them with the device’s serial number and location information.
  3. Recover Your Device: If you’re able to recover your device, you can restore it from a backup or set it up as new.

Tips and Best Practices

  • Enable Two-Factor Authentication: Enable two-factor authentication on your Apple ID account to add an extra layer of security.
  • Keep Your Device Up-to-Date: Regularly update your device’s software to ensure you have the latest security patches and features.
  • Use a Strong Passcode: Use a strong passcode or password to protect your device and data.

By following these steps and tips, you can use Find My to locate and recover your iPhone or iPad if it’s lost or stolen. Stay safe and secure!

How to use iPhone Mirroring on Mac

If you’ve ever wanted to control your iPhone directly from your Mac, iPhone Mirroring on macOS makes it easier than ever. With the latest Apple updates, users can now view and interact with their iPhone screen seamlessly on a Mac, enabling multitasking, faster communication, and productivity like never before.

In this guide, we’ll walk you through how to set up and use iPhone Mirroring on a Mac, its requirements, and how to make the most of this powerful feature.

What Is iPhone Mirroring?

iPhone Mirroring allows you to wirelessly view and control your iPhone’s screen on your Mac. You can respond to messages, view notifications, drag and drop files, and use apps—all from your Mac, without touching your iPhone.

System Requirements

Before getting started, make sure the following conditions are met:

  • macOS Sequoia or later
  • iOS 18 or later
  • Mac and iPhone must use the same Apple ID
  • Both devices must have Bluetooth, Wi-Fi, and Handoff enabled
  • iPhone should be nearby and unlocked

Step-by-Step Guide: How to Use iPhone Mirroring on Mac

Step 1: Update to the Latest Software

Ensure your devices are running:

  • iOS 18 or later on iPhone
  • macOS Sequoia or later on Mac

To update:

  • On iPhone: Settings > General > Software Update
  • On Mac: System Settings > General > Software Update

Step 2: Enable Bluetooth, Wi-Fi & Handoff

Both devices must be connected via:

  • Bluetooth
  • Wi-Fi
  • Handoff

To enable on iPhone:

  • Go to Settings > General > AirPlay & Handoff
  • Turn on Handoff

To enable on Mac:

  • Go to System Settings > General > AirDrop & Handoff
  • Toggle on Allow Handoff

Step 3: Sign in to the Same Apple ID

Make sure both devices are using the same Apple ID.

On iPhone:
Go to Settings > [Your Name]
On Mac:
Go to System Settings > Apple ID

Step 4: Open iPhone Mirroring on Mac

  1. On your Mac, open the Control Center
  2. Click on the iPhone Mirroring icon
  3. Select your iPhone from the list
  4. Your iPhone screen will appear in a separate window

Step 5: Use Your iPhone from Your Mac

Once mirrored, you can:

  • View and respond to iPhone notifications
  • Use keyboard and mouse to control apps
  • Drag and drop files between Mac and iPhone
  • Open apps, browse Safari, and more

Pro Tips for iPhone Mirroring

  • Use a trackpad or Magic Mouse for touch-like gestures
  • Use Spotlight search on Mac to launch iPhone Mirroring faster
  • For privacy, lock or hide the mirrored screen when not in use
  • This works great with iMessage, Notes, Safari, and Photos

Why iPhone Mirroring Is a Game-Changer

This feature bridges the gap between mobile and desktop workflows, enhancing:

  • Productivity for multitaskers
  • Seamless communication for remote work
  • Effortless app access for creators and developers
  • Unified experience across Apple devices

How to FIX Laptop Hang and Freeze Problem Solution in Windows 10/11

Is your Windows 10 or 11 laptop hanging or freezing frequently? Whether it’s slow response, laggy performance, or complete system freeze, these issues can seriously disrupt productivity. Fortunately, most laptop freezing problems can be fixed with simple software and hardware checks.

In this guide, we’ll walk you through step-by-step solutions to fix laptop hang and freeze issues on Windows 10/11. These fixes are beginner-friendly and you don’t need advanced tech skills to follow along.

Common Causes of Laptop Hanging in Windows

  • Insufficient RAM or storage space
  • Background processes consuming system resources
  • Corrupted system files
  • Malware or viruses
  • Outdated drivers or Windows updates
  • Faulty hardware (HDD, RAM, GPU)

Step-by-Step Guide to Fix a Freezing or Hanging Laptop

Step 1: Restart Your Laptop

A simple reboot can clear temporary glitches and stuck background tasks.

How to do it:

  • Press Ctrl + Alt + Delete
  • Click the power icon and select Restart

Step 2: Check for System Updates

Running outdated Windows versions can cause instability.

Steps:

  1. Go to Settings > Windows Update
  2. Click Check for Updates
  3. Install all available updates
  4. Restart your PC

Step 3: Free Up Disk Space

Low storage slows performance and causes freezing.

How to clean up:

  1. Open Settings > System > Storage
  2. Use Storage Sense or manually delete temporary files
  3. Empty Recycle Bin

Step 4: Disable Startup Programs

Too many startup apps can overload your system at boot.

To disable them:

  1. Press Ctrl + Shift + Esc to open Task Manager
  2. Go to Startup tab
  3. Disable unnecessary apps

Step 5: Scan for Malware or Viruses

Malware can slow down your system and cause hangs.

Use Windows Defender or a trusted antivirus:

  1. Go to Windows Security > Virus & Threat Protection
  2. Click Quick Scan or Full Scan
  3. Remove any threats found

Step 6: Update Drivers

Outdated or corrupt drivers cause freezes, especially graphics or chipset drivers.

Steps:

  1. Right-click the Start button > Device Manager
  2. Expand Display adapters, Sound, and Network
  3. Right-click each device > Update driver

Step 7: Run System File Checker (SFC)

This checks and repairs corrupted system files.

To run SFC:

  1. Type cmd in the Windows search bar
  2. Right-click Command Prompt > Run as Administrator
  3. Type: sfc /scannow and press Enter
  4. Wait for the scan to complete and follow instructions

Step 8: Perform a Clean Boot

This helps identify software conflicts.

Steps:

  1. Type msconfig in the search bar
  2. Go to Services tab > Check Hide Microsoft services
  3. Click Disable All
  4. Go to Startup > Open Task Manager and disable all items
  5. Restart your PC

Step 9: Check RAM and HDD Health

Faulty RAM or hard drive can freeze your laptop.

  • Use Windows Memory Diagnostic to check RAM
  • Use chkdsk or third-party tools like CrystalDiskInfo to check HDD/SSD health

Step 10: Reset or Reinstall Windows (Last Resort)

If nothing works, a system reset may help.

Steps:

  1. Go to Settings > System > Recovery
  2. Choose Reset this PC
  3. Select Keep my files or Remove everything

Laptop hanging and freezing on Windows 10 or 11 is often caused by software bloat, outdated drivers, or hardware issues. With the right steps, you can restore smooth performance and avoid costly service calls.

How to have your iPhone or iPad read text to you

Want your iPhone or iPad to read articles, emails, or books aloud to you? With Apple’s built-in accessibility features like Speak Screen and Speak Selection, your device can easily convert on-screen text into speech perfect for multitasking, learning, or enhancing accessibility.

Whether you’re visually impaired, trying to reduce eye strain, or simply prefer to listen instead of read, this guide shows you how to set up and use this helpful feature in just a few steps.

Why Use Text-to-Speech on iPhone or iPad?

  • Enhances accessibility
  • Helps with language learning
  • Useful for multitasking or on-the-go listening
  • Reduces screen fatigue

Step 1: Enable Speak Selection and Speak Screen

  1. Open the Settings app on your iPhone or iPad.
  2. Tap on Accessibility.
  3. Under Vision, tap Spoken Content.
  4. Toggle on:
    • Speak Selection – lets you highlight and hear specific text.
    • Speak Screen – reads all visible text aloud when you swipe down with two fingers.

Step 2: Adjust Voice & Speaking Rate (Optional)

In the same Spoken Content menu:

  • Tap Voices to choose your preferred voice and language.
  • Adjust the Speaking Rate slider for faster or slower reading.
  • Toggle on Highlight Content if you want spoken words to be visually highlighted.

Step 3: Use Speak Selection to Read Specific Text

  1. Open any app with selectable text (e.g., Notes, Safari, Mail).
  2. Highlight the text you want read aloud.
  3. Tap Speak from the pop-up menu.

Your device will read only the selected portion.

Step 4: Use Speak Screen to Read the Entire Page

  1. Swipe down from the top of the screen with two fingers.
  2. A playback control will appear, and your device will begin reading the entire screen aloud.

You can pause, rewind, or fast-forward using the on-screen controller.

Step 5: Ask Siri to Read Content (Optional)

You can also activate Siri and say something like:
“Speak screen” or “Read this”
Note: Siri will only read content when Speak Screen is enabled.

Bonus Tip: Enable Typing Feedback (Optional)

  • Still in Spoken Content, you can also toggle on Typing Feedback to hear words or characters spoken as you type. Great for accessibility and typing accuracy!

Apple’s text-to-speech tools are more than just accessibility features they’re productivity boosters and learning aids for everyone. Whether you’re catching up on reading while walking or supporting a child’s literacy, your iPhone or iPad can become your personal narrator.

MENU
skyblue-oryx-747718.hostingersite.com